Aug 22, 2010

Tooled Leather Checkbook Cover -- Start to Finish.


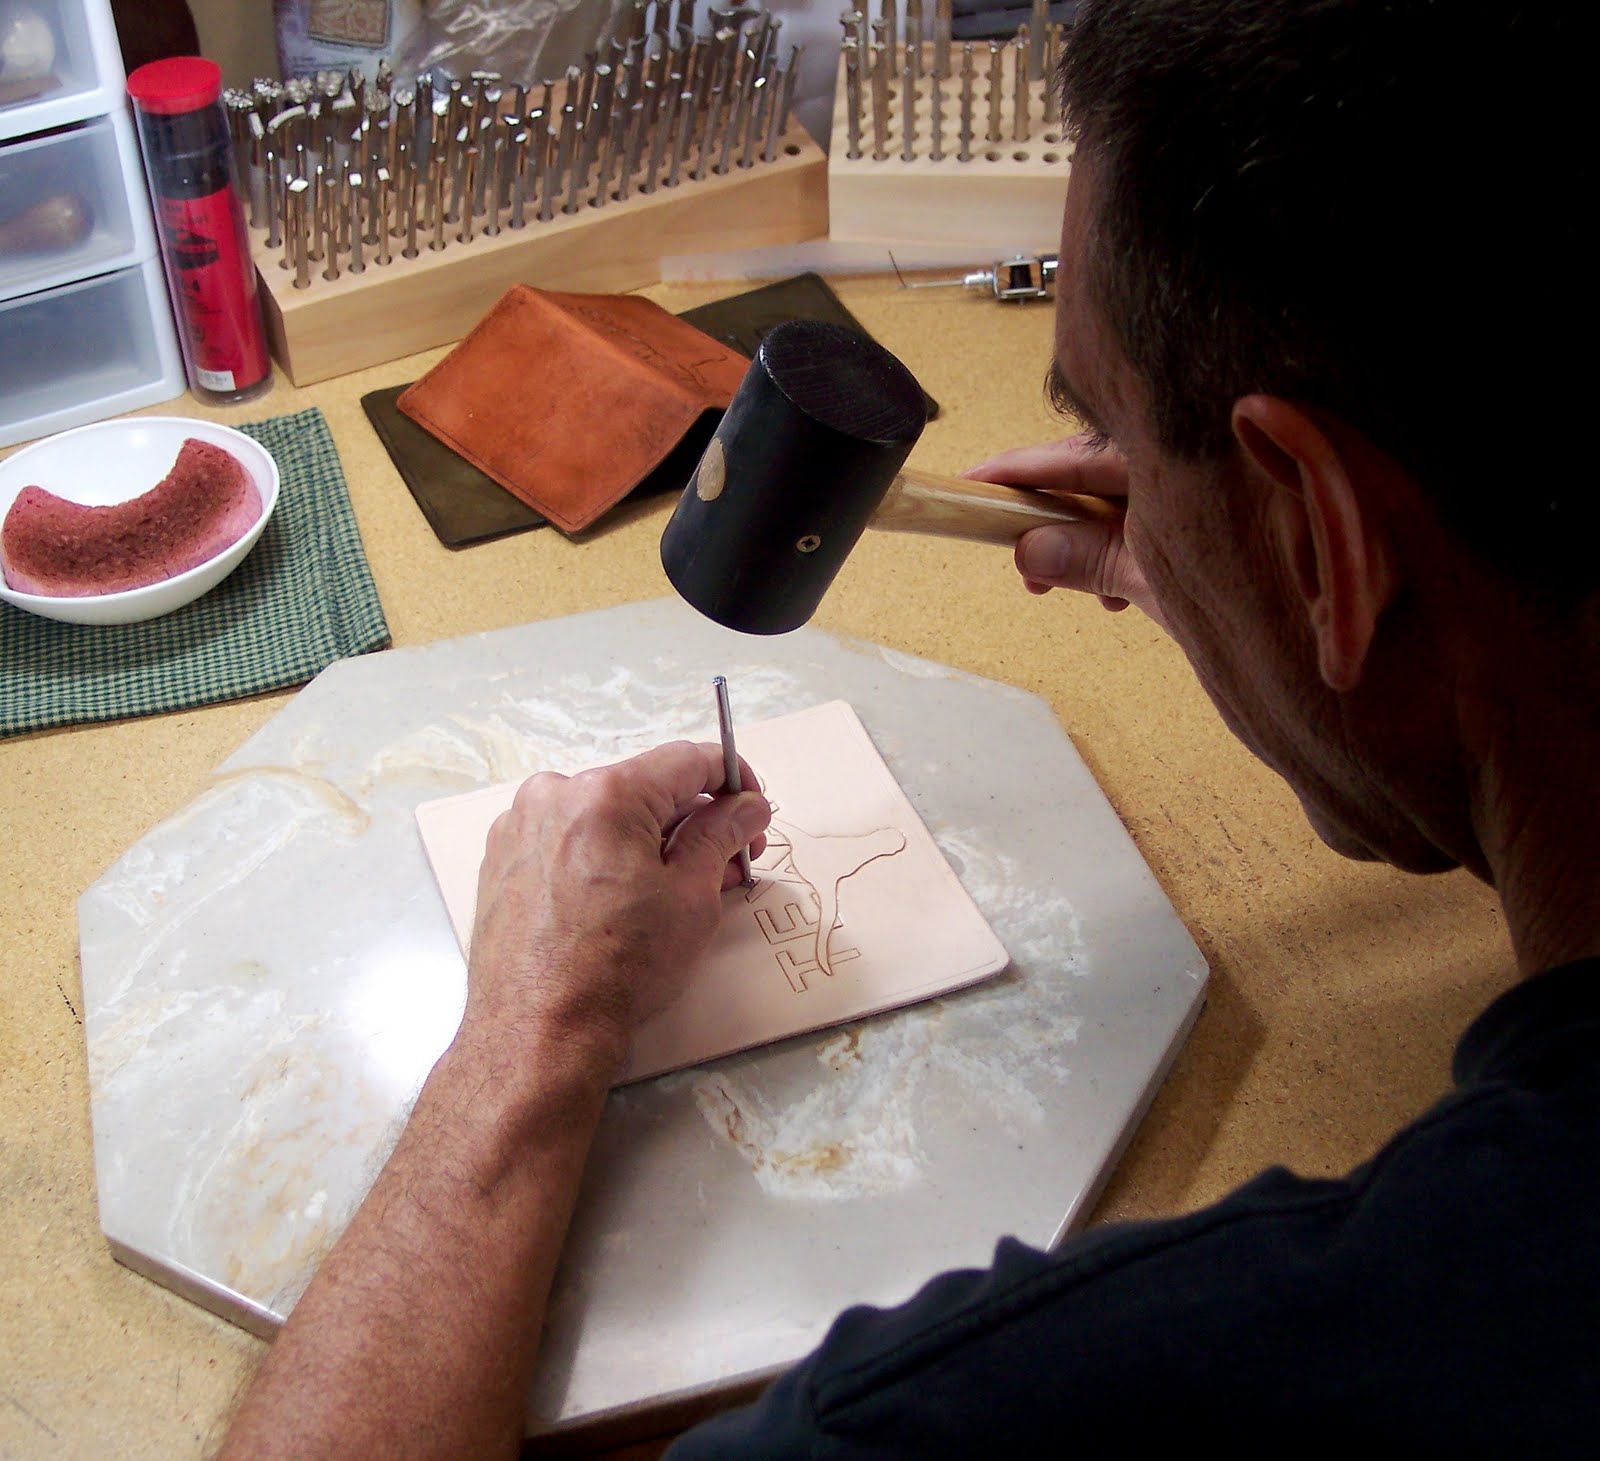
This is Phil...well, no this is the tooled leather checkbook cover he made. But those are Phil's hands. And he's going to show most of how he made it.

(As always, click on any picture to enlarge it for more detail. Except the one there on the right, and I don't know what happened to it.)


First, you start with a BIG piece of leather and spread it out on the living room floor.
Next, measure and cut the pieces you need.  Consider putting a board underneath so you don't cut the carpet.
Then, using a "Grooving Tool" you groove.
This makes a place for stitches later when he stitches the outer leather to the inner lining and pockets.
Groovy tool, isn't it?
(I'm NOT sorry.  That pun was practically mandatory.)
This is the edging tool.  It makes nice, smooth, beveled edges.  Very tidy.
Phil is using tracing paper onto which he has traced his own design.  Using a different colored ink (so he can tell where he's been) he goes over the design onto the damp leather, leaving a slight indentation.  These indentations become his lines for cutting.
Now he cuts the design with the swivel blade.  He makes it look soooooo easy.
I have tried to use this.  It's not easy.
Now, depending on the design, degree of complexity, etc. etc. etc., he tools the design into the damp leather.
If the design is a complex one like this, or has a textured background, this step takes a long time,
requiring refrigerator storage in plastic to keep the leather damp.  If it dries out, things go south pretty fast.
This is a fairly straightforward design.  No background texture, only horns.
This part gets messy (and sometimes stinky), so he has to go outside to the carport.     Stain on.....
Stain off!    Since leather is a natural material, every piece takes the stain differently.  Sometimes even pieces from the same hide can take same stain differently!
Now it's time for the stitching wheel.  It makes tiny dents to space the stitches evenly. 
The next step (are we there yet?) is to make holes for the stitches.  For this he uses a very pointy awl, y'all.
Next, of course, is the actual stitching.
He sews the outer leather, inner lining, and and interior pockets together, so it lasts a loooooong time.
(There's smelly glue and lining leather involved, but we skipped that part.)  
And here is Phil with the finished cover.  I think he's a genius (also handsome, funny, and an excellent driver),
but I may be biased.

Jul 13, 2010

Wild Mustangs!

Grapes, that is. which grows wild allllll over the place down here in South Texas. Only one out of every ten vines that sprouts from seed is a grape-bearing female, but given the number of seeds the birds plant, that's a really good thing. We'd be hip deep in grapes right now.


We don't exactly live out in the sticks, but we do live in the country. This is the road "to civilization" and we drive it every day--all the better to check on whether the grapes are ripe. ;~)


This is a pretty sparse section of the vine--which covers a good 150 feet of fenceline--but I like the structure of the vine showing. It's a pretty old and well established one, the trunk in some places measuring five or six inches across. Tangled up in the barbed wire, growing side-by-side with stickers and prickly pear, it makes for an interesting harvest.


Did I mention the spiders? This is a Golden Orb spider, at work on a recent meal. They eat grasshoppers, sometimes bigger than they are, and for this we are grateful, because we've had a veritable plague of hoppers this year. This is the smaller of the two I encountered, at maybe 2.5" toe to toe.


Here is her larger sister, almost 4", and in this you can see her underside, along with the characteristic zig-zag they always make in their webs. When I eased in close for this photo, this one reared her abdomen toward me...not sure what she planned to do, but I was glad she was on THAT side of the web.


I had to work pretty hard to gather these grapes (should have gone out a few days earlier, before the birds had gotten all the easy-to-reach ones!) and came home sweaty, itchy, scratched and with a bleeding finger because I got clumsy w/ the nippers. But I was also full of gratitude and wonder at the beauty of this vine, her citizens, her generosity. I felt connected to nature, and was humbled by it.


This ended up being about 10 lbs, after a half hour of picking. Next year, if we go a before the birds get them, and the husband goes with me (and I am more careful not to cut myself), we can get three or four times this amount and make a more substantial batch of wine. Ideally, I'd like to pick enough to make several "experiments", involving different types of wine-yeast, different initial processing.


De-stemming took twice as long as picking. The deep red skins come off very easily, leaving a pale blob of grape w/ a seed inside. (It looks a little like a jellyfish.) So far I've only ever brewed mead and pear wine, which requires the addition of tannin, or tannic acid, either from a couple of teabags or actual tannin powder from the brew shop. But the skin of grapes have plenty of their own. You can make white wine, or a blush, from these grapes easily enough, given their slip-skin nature, but why? The red is so beautiful!


Another difference is that these grapes are verrrrry acidic (hence the gloves) and require a lowering of acidity once the must (the mess of mashed seeds and skins) has been removed. I have to go find some calcium carbonate to add to the brew once I get through the first week of must fermentation. Going through my brewing supplies, I was amused to find the opposite: powdered acidifier. Guess I won't need that for this particular vintage. Once I remove and press the must, I'm figuring I'll have two gallons to put in glass carboys for the next stage of fermentation.

I love brewing! There is something about the alchemy of seeing the process develop before your eyes, (we like to take credit, but it's not rocket science). Again, I'm grateful for the privilege of this connection to nature, being part of the give and take between us and the land we live on. Now, if I can just convince that mother vine in our front yard to stay out of the oak and up on a fence, we won't have to go down the road for our grapes!

Hope your Tiw's Day is a lovely one.

May 20, 2010

Flowers!

(Click once for zoom, twice for ultra-zoom.)


Okay, this isn't flowers...it's the Schultz and his foster cat Waylon, bein' all luvy-duvy.


Mexican Elderberry. Apparently I'm going to have to wait until the bush gets bigger (right now it's only 3 or 4 feet tall) before it has enough berries for me AND the birds.


Blackberries. Well, they're blackberries now, right here they were only flowers...or, berries-to-be. Of course they'll ripen while we're on vacation. Hope the neighbor girl likes blackberries. Hmph.


The Red Cascade rose...she's sprawling all over the place, and constantly flowering.
I think she likes living here.


Larkspur, yarrow, pansies, roses (way in the back, probably can't see them) and poppies!


I try not to splurge on plants...or at least buy the ones that provide food, medicine, bird-cover or evergreen landscape value. But this black iris...I just couldn't resist. Too bad you can't smell it on the computer...it's heavenly.

So....
These pictures aren't the most recent--they're a couple of weeks old at least, and I'll load up the more recent ones soon--the veggie garden is amazing now!