This is Phil...well, no this is the tooled leather checkbook cover he made. But those are Phil's hands. And he's going to show most of
how he made it.
(As always, click on any picture to enlarge it for more detail. Except the one there on the right, and I don't know what happened to it.)
 |
First, you start with a BIG piece of leather and spread it out on the living room floor.
Next, measure and cut the pieces you need. Consider putting a board underneath so you don't cut the carpet. |
 |
Then, using a "Grooving Tool" you groove.
This makes a place for stitches later when he stitches the outer leather to the inner lining and pockets.
Groovy tool, isn't it?
(I'm NOT sorry. That pun was practically mandatory.) |
 |
| This is the edging tool. It makes nice, smooth, beveled edges. Very tidy. |
 |
| Phil is using tracing paper onto which he has traced his own design. Using a different colored ink (so he can tell where he's been) he goes over the design onto the damp leather, leaving a slight indentation. These indentations become his lines for cutting. |
 |
Now he cuts the design with the swivel blade. He makes it look soooooo easy.
I have tried to use this. It's not easy. |
 |
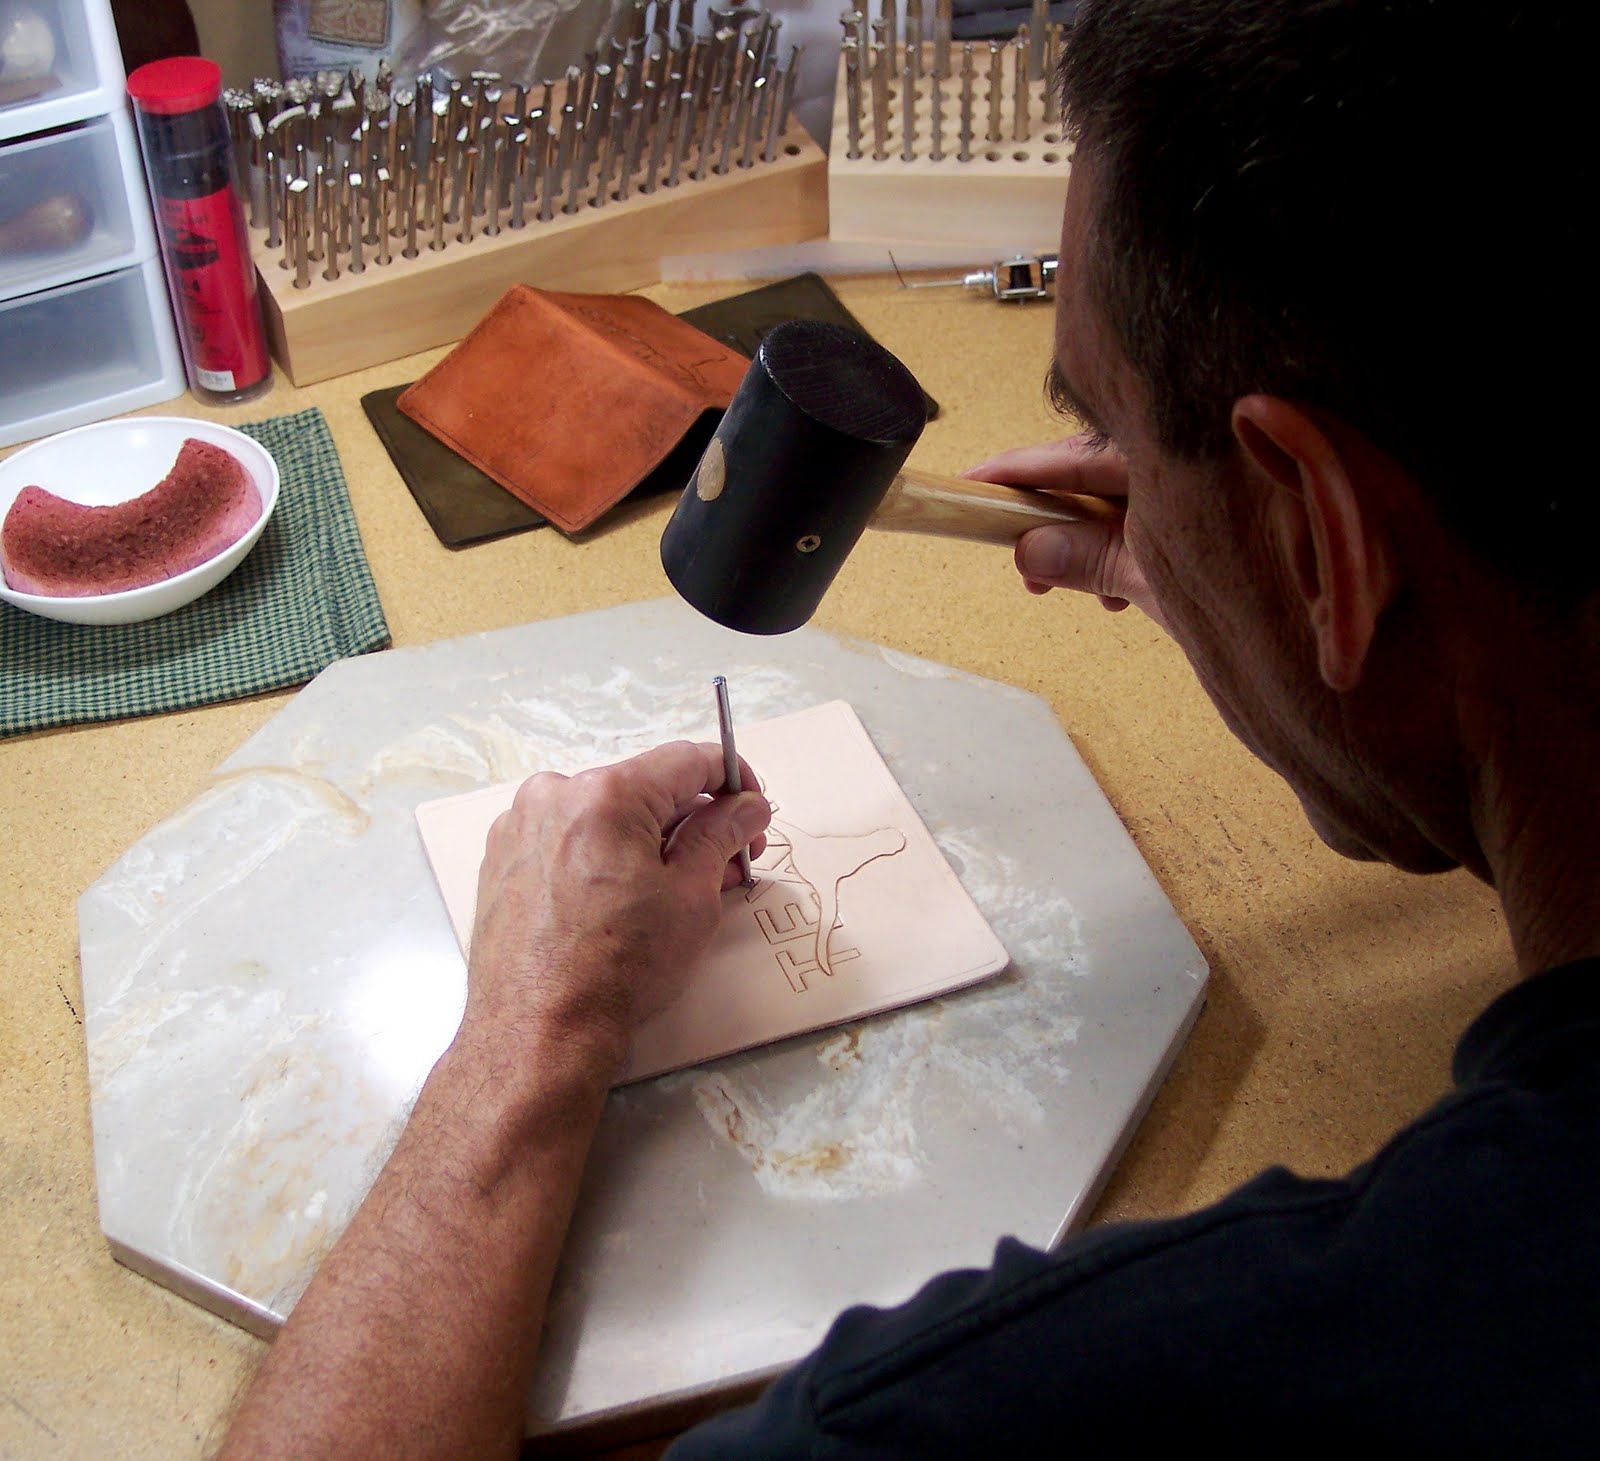
| Now, depending on the design, degree of complexity, etc. etc. etc., he tools the design into the damp leather. |
 |
If the design is a complex one like this, or has a textured background, this step takes a long time,
requiring refrigerator storage in plastic to keep the leather damp. If it dries out, things go south pretty fast. |
 |
| This is a fairly straightforward design. No background texture, only horns. |
 |
| This part gets messy (and sometimes stinky), so he has to go outside to the carport. Stain on..... |
 |
| Stain off! Since leather is a natural material, every piece takes the stain differently. Sometimes even pieces from the same hide can take same stain differently! |
 |
| Now it's time for the stitching wheel. It makes tiny dents to space the stitches evenly. |
 |
| The next step (are we there yet?) is to make holes for the stitches. For this he uses a very pointy awl, y'all. |
 |
Next, of course, is the actual stitching.
He sews the outer leather, inner lining, and and interior pockets together, so it lasts a loooooong time.
(There's smelly glue and lining leather involved, but we skipped that part.) |
 |
And here is Phil with the finished cover. I think he's a genius (also handsome, funny, and an excellent driver),
but I may be biased. |


Coach Gramercy leather checkbook wallet?
ReplyDeleteleather checkbooks